


Not Just for Beginners
On Monday, I posted an introduction to Project Appleseed and today I’m following that up with some more detailed thoughts about my personal experience at one of their rifle clinics that I attended back in November.
Some people seem to have gotten the impression that Project Appleseed is just for new shooters. It’s true that the curriculum is focused on the fundamentals, and even someone who has never touched a rifle before should be able to walk into a Project Appleseed clinic. That said, there is plenty for seasoned rifle owners to sink their teeth into. If nothing else, you’ll get a chance to see how someone else teaches the basics of rifle marksmanship, and that’s something you can add to your toolbox when it comes time to teach someone new how to shoot.
As someone who’s been learning about and practicing rifle shooting for over a decade, the majority of the concepts presented were not completely new to me. That said, my rifle technique could best be described as “sloppy”. I am much more at home with a handgun and a shot timer, working on getting faster with “good enough” accuracy that usually involves a target zone eight inches wide. Peering through a peep sight at a one inch square is not what I typically do with my range time.
It’s not that I dislike rifles, or that I find precision shooting boring. Far from it. My safe is full of long guns, each very well used and well loved. I’ve even shot rifles in competition on a couple of occasions. But I’ve spent very little time honing my marksmanship skills for slow-fire rifle, and that’s what Project Appleseed is all about. And with the time limits imposed by the Appleseed Qualification Test, even precision shooting can feel just as intense as the more “action” oriented shooting disciplines.
So despite my past experience, the Appleseed curriculum was both interesting and informative. But if I had to pick just three takeaways that were most meaningful to me as a shooter, they’d be the following lessons:
Lesson 1 – Natural Point of Aim
“Essentially, the concept of Natural Point of Aim, or “NPOA”, is moving your body into the correct position so that the rifle naturally rests on target.”
Here’s a concept I had heard of and read about on numerous occasions before attending Project Appleseed. But to be honest, it’s something I rarely put into practice, partly because I didn’t really grasp the full advantage that it offers. Essentially, the concept of Natural Point of Aim, or “NPOA”, is moving your body into the correct position so that the rifle naturally rests on target.
Imagine you’ve got a rifle mounted on a bipod, and you’re shooting it from a bench with sandbags supporting the rear of the buttstock. You aim down the sights at the target and notice that the front sight is six inches lower than it should be. What do you do to fix it? You could manually raise up the front of the rifle and hold it there until the shot breaks. But applying pressure to the rifle manually is inherently unstable and causes unsteadiness and shaky sights. The easier solution would be to simply adjust the bipod to raise up the rifle the appropriate amount. Let the bipod do the work, right?
NPOA is basically the same concept, but instead of a bipod, you’re depending on a steady shooting position supported with a sling. If you have achieved NPOA, the rifle should be simply “resting” in the support hand. To make the upward adjustment in the above example, instead of adjusting the bipod, you would shift your strong-side foot rearward slightly in order to bring the sights up.
For slow-fire rifle shooting, the idea is to achieve a correct NPOA for every shot in order to maximize accuracy. If you change targets, instead of shifting the rifle over, you shift your whole body so the rifle is naturally resting in the correct position. This, of course, takes time and practice to master (and I have a long way to go before it’s “second nature” for me), but it’s a sure way to achieve a rock-steady sight picture every time.
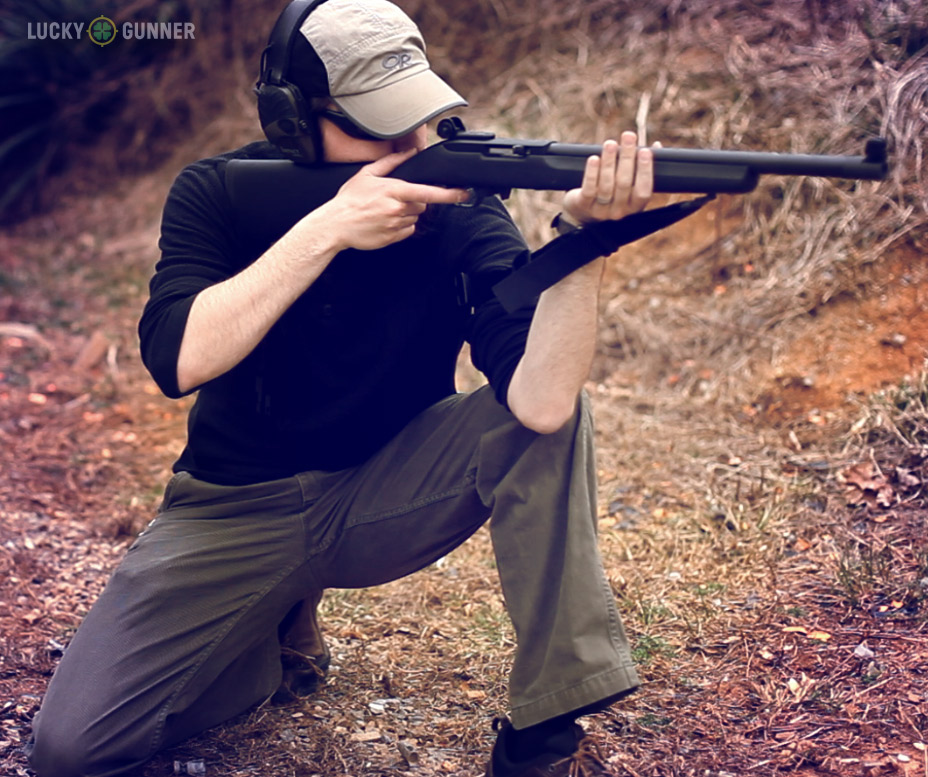
Lesson 2 – The Hasty Sling
I’ve been using the hasty sling ever since a seasoned High Power shooter showed it to me over a decade ago. It’s quick way to add a lot of stability to your shot, and it will work with almost any sling. Other uses of the sling for support require a GI style sling with a loop at one end. The shooter has to detach the rear of the sling from the buttstock, adjust the loop, stick the support arm through the loop, then tighten it down. That takes time, and can be tedious if you just want a bit of extra support before taking a quick shot.
On the other hand, the hasty sling technique only takes about a second, and can be done with almost any two-point sling, as long as you can adjust it to the right length. Keep the sling attached at both points, and follow the steps below:
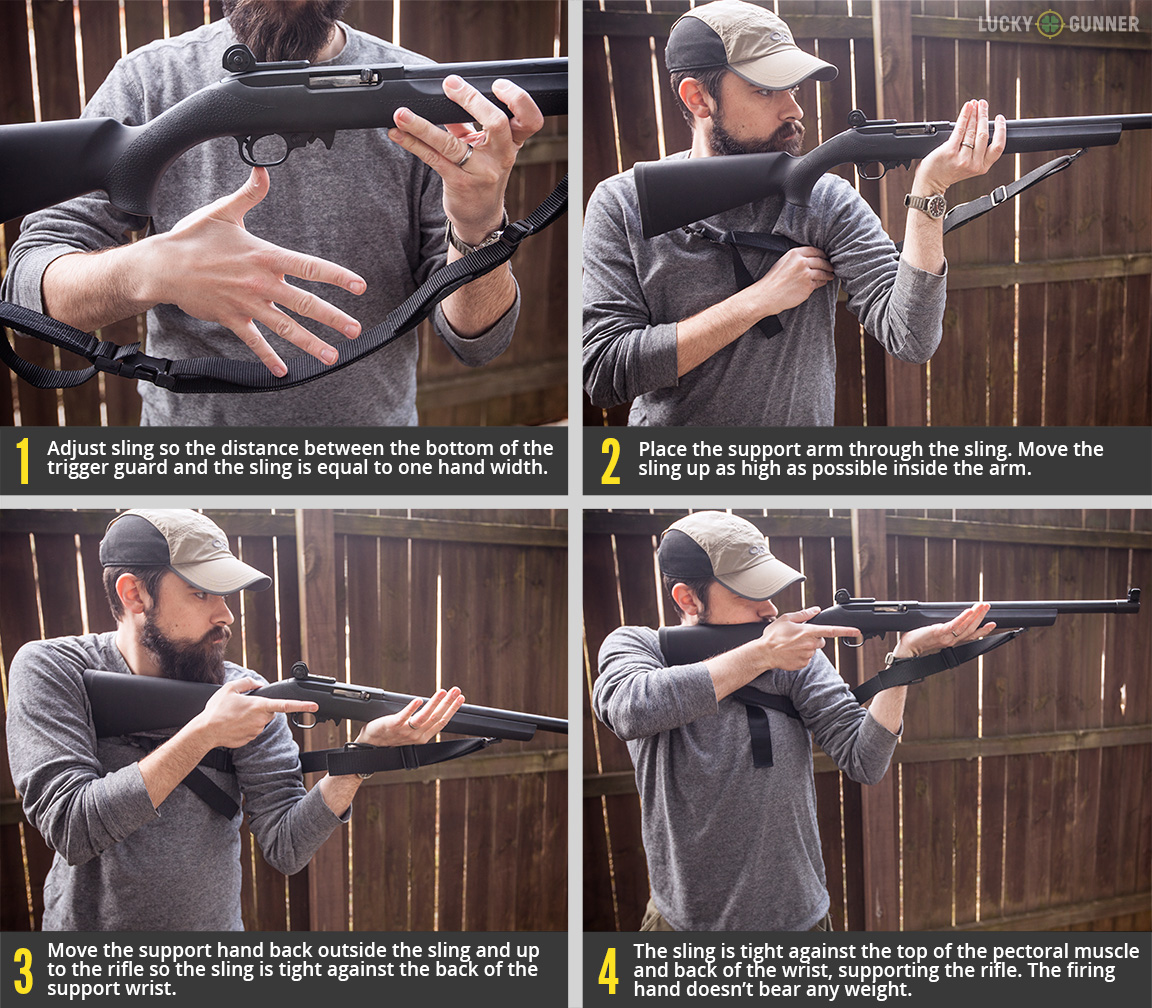
The reason I’m including the hasty sling among the lessons learned at Appleseed is because I had apparently been doing it incorrectly for years. To get the maximum potential out of using the hasty sling, you have to blade your body to the target so the sling is snug up against the top of your pec and under the armpit. If you’re standing too square to the target like I had been doing, the support arm ends up doing more of the work and that gets tiring really quick. But used correctly, the hasty sling is an incredibly useful technique to have in your toolbox.
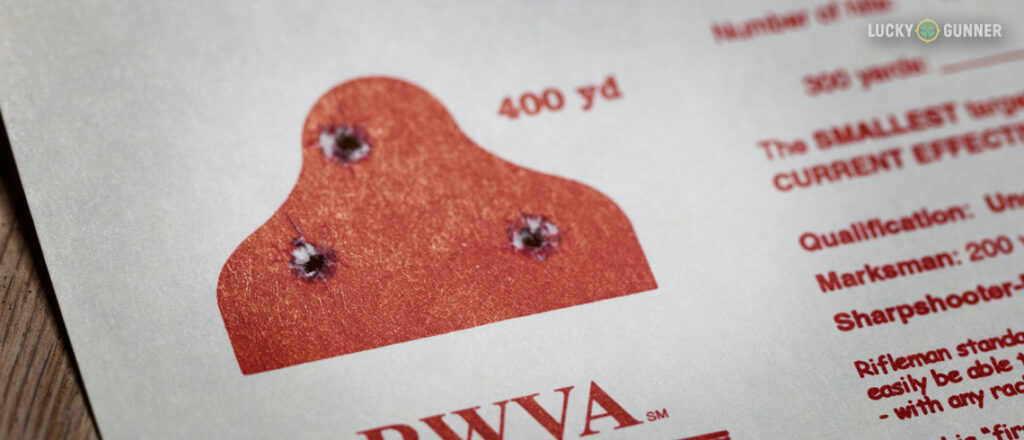
Lesson 3 – Dirty Rifles Don’t Shoot Straight
This last lesson wasn’t was actually part of the Project Appleseed course, but it’s one of those lessons I learned the hard way through the course of the weekend. I know clean guns are more accurate and function better. But here’s the thing — I hate cleaning them. I know some of you people find cleaning your guns to be some kind of weird cathartic zen experience. I don’t get it. But I also think Hoppes No. 9 smells like the death of a million brain cells, and enough people like it that they made an air freshener out of it, so I guess I’m the weird one.
Because I hate cleaning guns, I made the mistake up showing up to an Appleseed with a dirty rifle. Of course, I ran a bore snake through the Ruger 10/22 a couple of times the day before, but when you’re shooting cheap bulk pack lead round nose .22 LR, a bore snake just isn’t gonna cut it. There weren’t any problems to start off, but by mid-morning of the second day, my targets were looking progressively worse. I had been doing fairly well up until that point. At least my misses were within an inch or so of the intended target. But then I started missing to the left by three or four inches, and it was getting progressively worse with each string of fire.

After checking everything with my technique and on the rifle that I could think of, I asked one of the instructors for some help. When his three shot group with my rifle veered off the left edge of the paper, I breathed a sigh of relief. The rifle might have a problem, but at least I wasn’t experiencing spontaneous target-blindness. The same instructor helped me thoroughly clean the rifle, and we saw a lot of lead build-up in the bore. After cleaning that out, the 10/22 was back to normal, and at least as accurate as the bulk pack ammo and I allowed it to be.
The moral of the story? Bore snakes are great for a quick cleaning, and will probably even work if you’re just firing the occasional box of FMJ. For lead round nose ammo, you really need a proper cleaning rod and brush to get all that junk out.
So About that Rifleman’s Patch…
In Monday’s post, I promised to follow up and tell you whether I earned the coveted Rifleman’s patch. Well… no, I didn’t. And I’m going to be lame about it and blame my equipment. After the fiasco with the leaded barrel, I got back on the line and had repeated failures to feed with the 10/22. Again, a symptom of using lead round nose ammo that doesn’t quite agree with the Ruger. So I switched over to the backup rifle that I had brought along; a Savage Mark II FV-SR.
Of course, going from an iron-sighted semi-auto to a bolt action with a magnified optic was not exactly an easy switch. But really, it wasn’t working the bolt that was holding me back, so I can’t exactly blame my equipment on that count. What really got me was the sitting/kneeling string of fire. I couldn’t quite find a position that worked for me and so I was wasting precious seconds on each AQT trying to get into a kneeling position that gave me a steady NPOA but also allowed me to grab the next magazine when it was time to reload.
I think I finally figured it out… on the last AQT, but I managed to botch my prone shots on that one so, no patch yet. But thanks to the solid instruction at Appleseed, I got a good idea of what I needed to work on and which techniques needed tweaking. I’ve had a bit of time to practice since then, and the next time an Appleseed rolls into East Tennessee, I plan to be there. And that patch will be mine…