


Selecting an optic for your rifle is often an exercise in making sacrifices.
A higher magnification scope allows for better target identification and more precise aiming but will be very difficult to use quickly at close range when say, you’ve startled an unseen hog. Having just one optic normally means that you give up some amount of utility in certain situations, and so it’s not surprising that one of the more recent trends in the rifle shooting community — particularly where the AR-15 is concerned–is the use of two separate optical sights on the same gun.
Typically, this involves pairing some kind of magnified optic for longer range shots with an unmagnified optic for close range shooting. This allows for much greater flexibility in how a single rifle may be utilized, but it is not without its own set of problems.
Mounting a second optic on your rifle, if even possible, is going to cost money, and depending on what optic and mount you choose you could be making a substantial investment. A second optic also adds some amount of weight and bulkiness which could complicate storage and carry.
Today, I’m going to show you a technique that allows certain magnified scopes to be used as a 1x red dot sight, and allows switching between modes in less than two seconds. It’s also incredibly intuitive and easy to do.
Occluded Eye Aiming
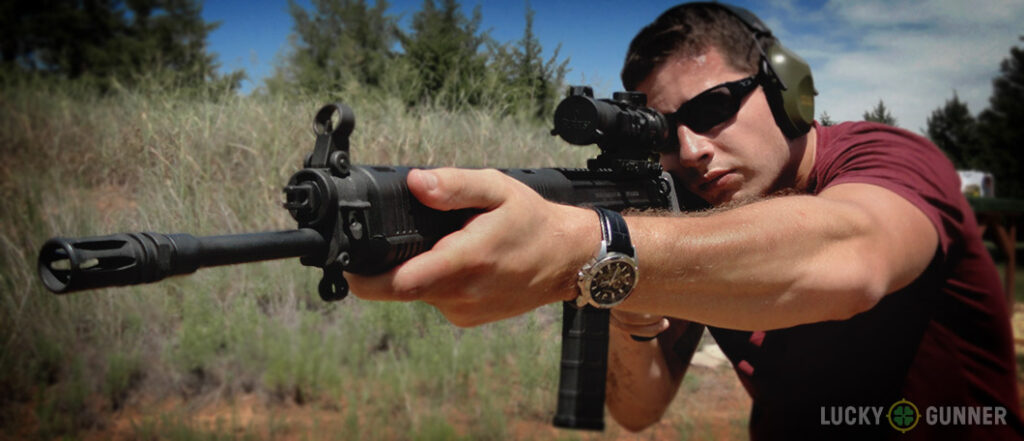
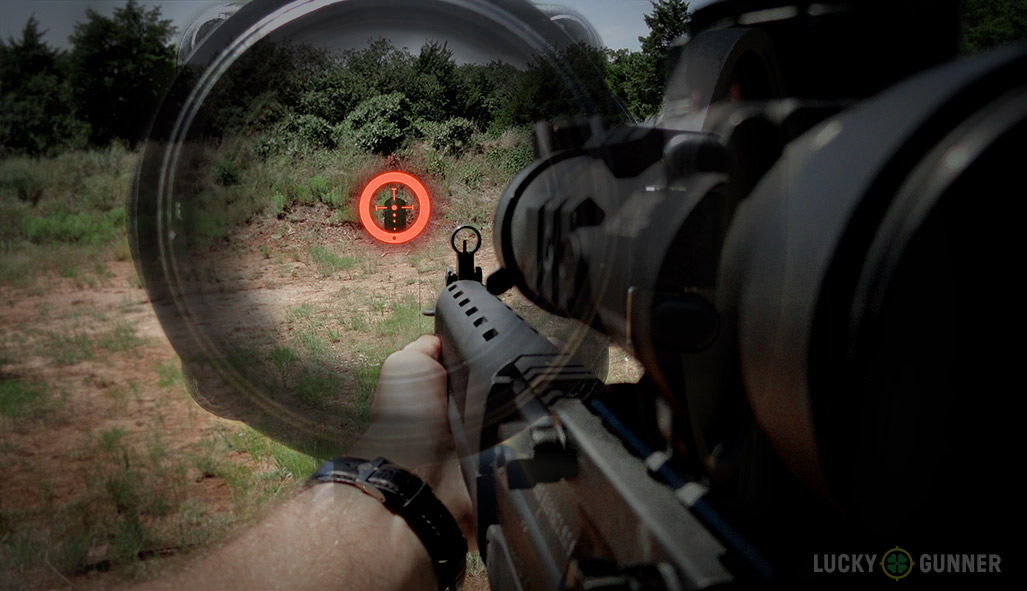
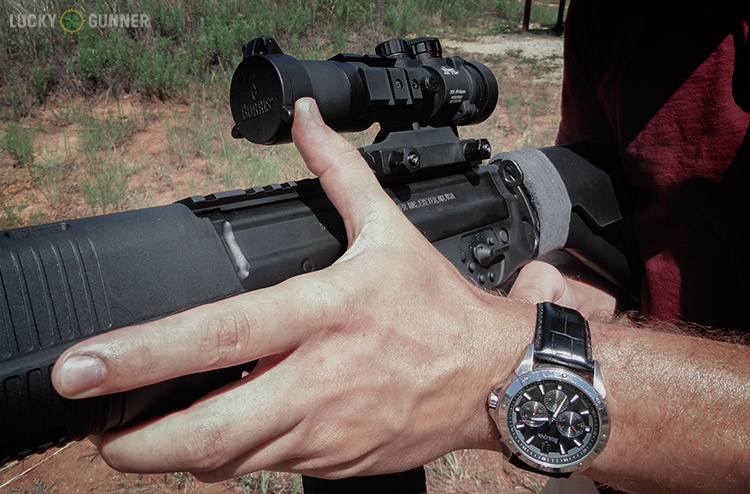
Careful observers may have noticed that in the title picture I have the objective lens cover of my rifle’s scope closed. At first glance it may seem like a simple goof, but it’s actually because I’m using a technique called occluded eye aiming. Occluded eye aiming takes advantage of our natural binocular vision, and our brain’s ability to merge information from both eyes into what we perceive as a single image. In the case of occluded eye aiming we merge the image of the scope’s reticle onto the image of the target.
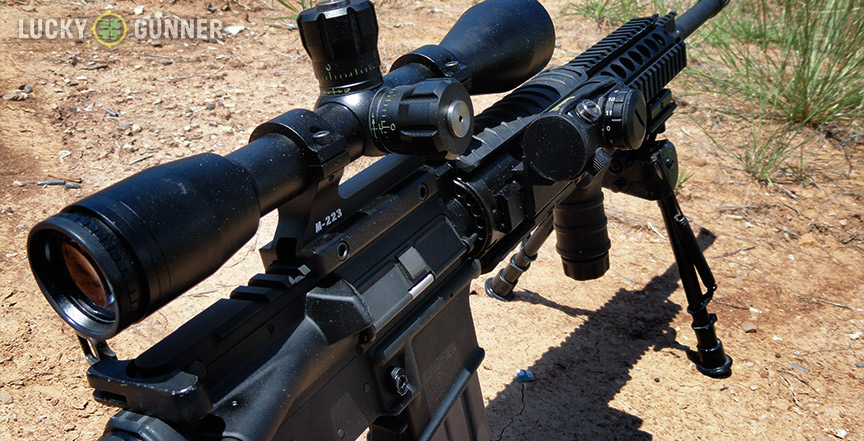
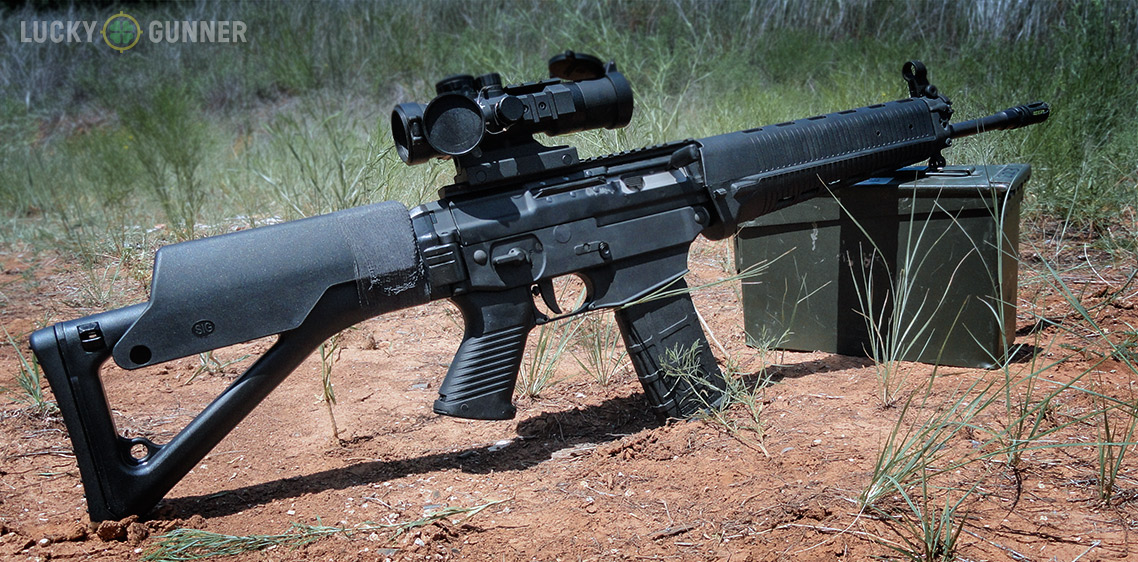
The ancient ancestors of modern red dot sights were actually purpose-built to use this aiming technique, but in order to use our scope as an occluded eye gun-sight all we’re going to need is an optic with an illuminated reticle and an objective lens cover. In this case, I am using a Burris AR-332 3x scope that ships from the factory with spring-open scope caps and an illuminated BDC reticle.
To shoot using the occluded eye method, simply turn on your scope’s reticle illumination and close the objective lens cap. The reticle does not need to be extremely bright due to the contrast around it created by the lack of light entering the scope tube, but you may want to adjust the brightness based on the target background or ambient light conditions. Aiming is done just as you normally would but it is essential to keep both eyes open, otherwise your brain won’t have an image of the target to work with.
What you will see is the reticle appearing to simply float on the target out in space. You will still maintain 100% of your field of view because your non-shooting eye fills in the blind spot directly in front of the optic.
Another advantage to using this technique is that it’s extremely fast to switch between occluded eye aiming and normal scope use. In fact, it’s faster than adjusting a magnification ring or activating a flip-over magnifier mount. If you find that a long shot is needed out in the field, simply slide the support hand thumb along the scope to open the front lens cap as you establish your support hand grip on the rifle.
Some of you out there might be asking, “Why close the front lens cap at all?” Well, it’s true that you can achieve some amount of “red dot effect” with any illuminated scope simply by keeping both eyes open, however it is often very difficult to juggle between focusing through the scope and focusing on the unmagnified view of the target and this only gets more difficult as the magnification level is increased. Occluded eye aiming forces a proper focus balance and works no matter what magnification level your scope is set to.
Not just a gimmick
I know some of you might be rolling your eyes thinking that this is some “tactical-Tommy” nonsense, but it does have some real world application.
Animals such as feral hogs and mountain lions pose a very real danger in many environments, and should one get the drop on you, you’ll need to make fast and accurate shots over a short distance which is very difficult to do with the magnified optics most of us prefer. Understanding and practicing this technique will allow you to be effective in these situations without adding bulk to your rifle or emptying your pocketbook.
On the competition and duty side of things, many rifles are only intended to be used at longer ranges, but sometimes competition stages and real world events do not cater to our expectations. A simple objective lens cap and knowledge of this technique may shave seconds off your stage-time as you get those 10 yard A-zone hits. My personal experience with this technique comes from my time spent on the CQB range and out in Afghanistan with an ACOG-equipped carbine and a piece of tape over my anti-reflection lens cover. Why not be that much more prepared when you likely have all you need already?
There’s just one catch…
While occluded eye aiming is an elegant solution for those needing a close range aiming device, it is important to understand its limitations. Because of the spacing between our eyes the image of the reticle is actually angled slightly in relation to our view of the target. This means that as the distance to the target increases, the strike of the rounds will drift farther and farther from our point of aim. The actual amount and direction of deviation will vary from shooter to shooter, and depends upon eye spacing, eye position, phoria, and whether the shooter is focusing on the reticle or the target.
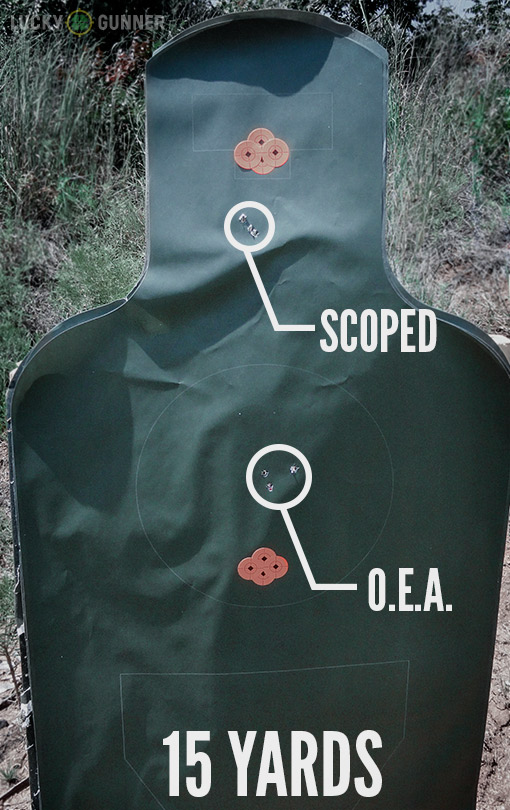
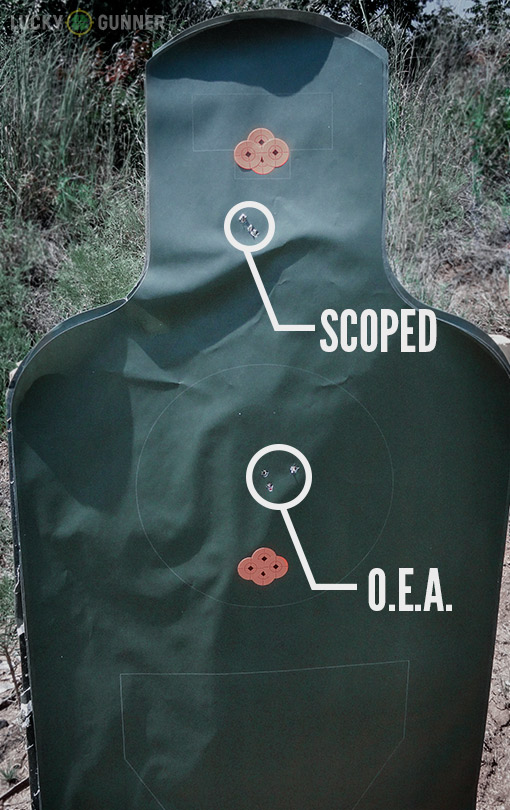
In order to show how dramatic the point of impact shift can be using occluded eye aiming I shot at distances of 5, 15, and 25 yards. Each target was shot first with a 3 round group in the head while looking through the scope normally. The objective lens cover was then immediately closed and another 3 shot group was fired using occluded eye aiming lower on the body while keeping my primary focus on the target.
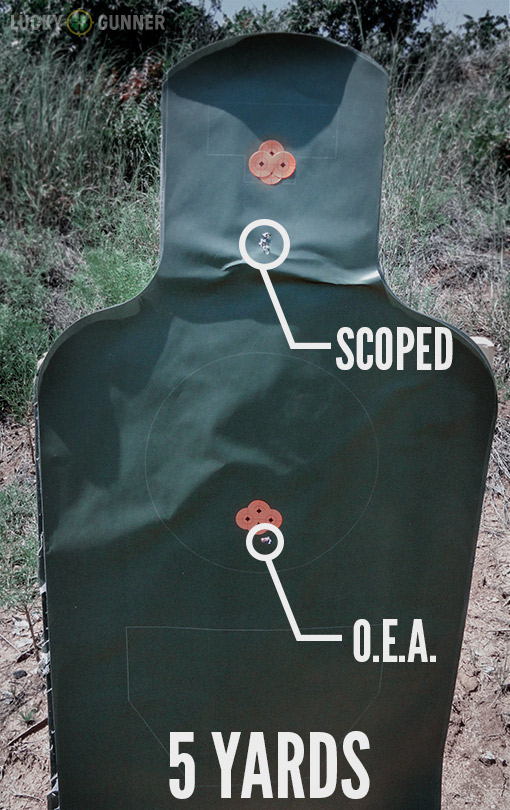
As you can see, the 5 yard line showed almost no difference between the positions of the shot groups relative to the point of aim. This is where occluded eye aiming really shines, and I actually shot a slightly tighter group without looking through the scope.
At 15 yards we’re starting to see the rounds wander off from our point of aim when the forward lens is occluded. Grouping is still reasonable in comparison to the test group however.
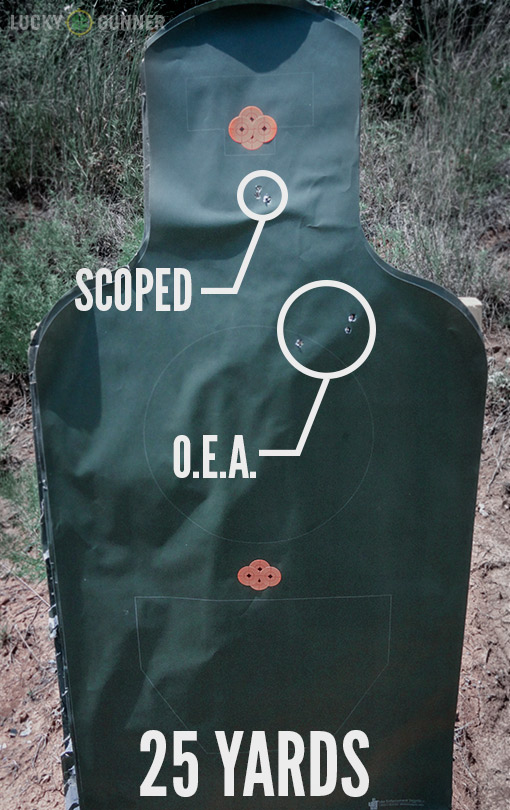
At 25 yards we’ve exceeded the useful range of this technique. Shots are now widely spaced and way off target. The vertical deviation is due to my eyes not being parallel to the ground when shooting, and the wide shot grouping is due to parallax created when the lens cover is closed.
Other shooters may experience different results. For example, it’s quite common for shots to deviate to the left instead of the right if the shooter focuses on the reticle instead of the target. The amount of vertical deviation is dependent upon the amount of head tilt necessary to obtain a cheek weld, and will vary between guns and shooters.
Final thoughts
Is occluded eye aiming an appropriate substitute for a quality red-dot optic for general use? Absolutely not. However, for shooters who anticipate needing a close range optic only occasionally, this technique may prove very useful; and while it may only be effective over short distances, learning your own personal impact shift can extend your range with this technique. If nothing else, it’s another tool for your mental toolbox that might just come in handy when an optic breaks during a competition or if your scoped rifle serves double-duty as a home defense weapon.
As always, feedback is appreciated and if you have any questions or comments please let us know!