When I ask folks why they don’t shoot more often, their answer is typically along the same lines: practice takes a lot of time and money. “I wish I could afford to shoot more,” they say with a shrug. But when I’m at the range, I often don’t see people using their time and ammo as efficiently as they could. They dump magazine after magazine quickly downrange with little purpose in mind. While I understand the joy of rapid fire as much as anyone, it’s not always the best for building skills that will translate into real-world preparedness. Here are a couple things you might consider to ensure you’re getting the most from your training time while making every round count.
1. Aim Small, Miss Small
Most of us tend to shoot as fast as we can while still hitting the target we’ve set up for ourselves. The standard B-27 police pistol target sold at most shooting ranges is actually intended for use at 50 yards. When you set it up at 5 yards at your local indoor range, it looks like you’ve hung a bed sheet in front of the shooting lane. You’ve given yourself a LOT of room to compensate for shooting errors, and you know that you can blaze away and still be “on paper” every time. Sure, there’s an x-ring in the middle, but when confronted with such a massive target, we get mentally lazy.
To fight that, pay attention to the details of the target. There are numbers printed all over it denoting increasing point values as you get closer to the center. What I like to do is have a friend call out a number or two, and then fire at the numbers themselves as quickly as possible, giving myself very little margin of error. Once I’ve poked holes in the numbers and made them unreadable, I staple post-it notes over them with replacement numbers written with a sharpie. Any hits outside the post-it note are a failure and require a second shot.
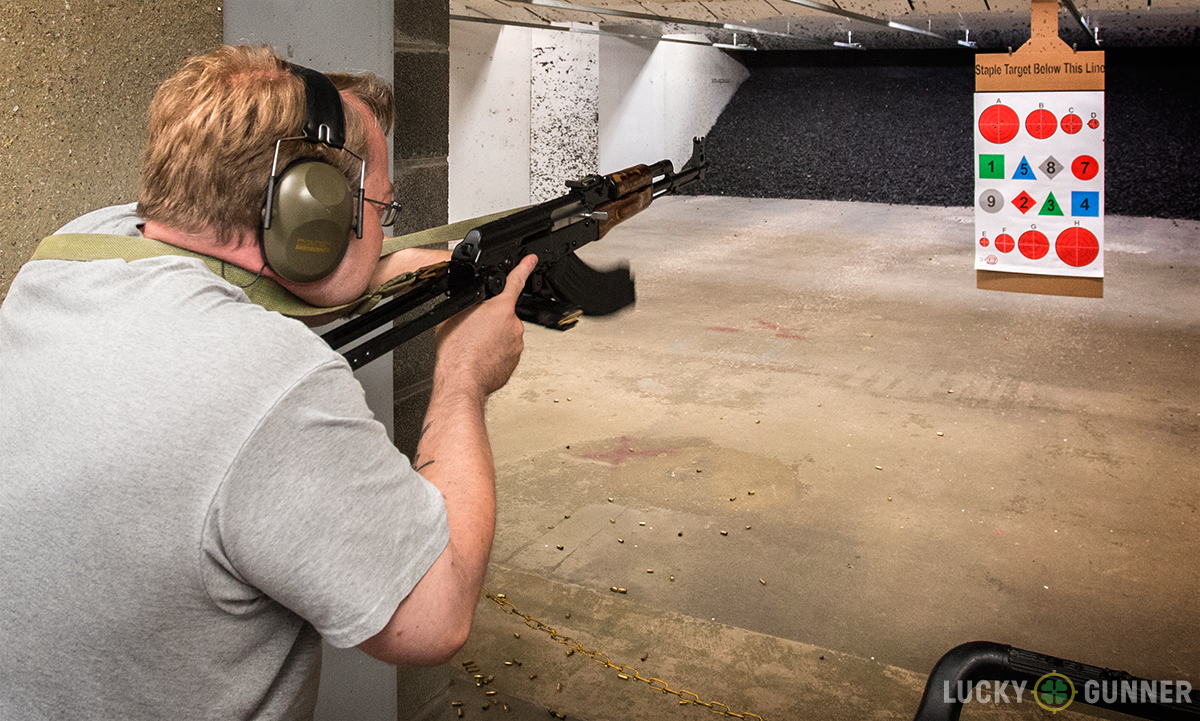
Once I’m feeling nice and arrogant about how good my shooting skills are, its time to move my cobbled-together target farther away. Can I repeat my performance at 15 yards? Nope. Humble pie is served! In this way every single round tests my ability to think and shoot quickly but deliberately. If you think ahead a little bit, you can order a variety of training targets online that feature numbered diamonds, circles, and other shapes in a variety of colors. They look weird but fulfill the same function as my “customized” post-it note targets, and they work great for classes or competition. Shooting at a more challenging target makes you focus harder and shoot slower, and shooting slower means it takes longer to fire the same number of rounds.
2. Practice Presentations
Different ranges have different rules. Many ranges don’t allow drawing from a holster, so make sure to check the rules and follow them. Even if holster work is disallowed, you can work on presenting your firearm from a low ready, high ready, position sul, or other position you’ve learned. The idea is to return the firearm to a point of rest in between shots fired, and practice your presentation from that point over and over again.
Remember the old adage “slow is smooth and smooth is fast”, and be deliberate. Presenting from the holster or from a sul position is one of the places where I’ve found that dry fire practice can actually be harmful, because your rush to quickly bring the gun up and acquire your sights often translates into yanking the trigger, but in dry fire practice you aren’t punished for your mistake with a missed shot. You can do fifty repetitions in front of the TV, drawing and “shooting” from your holster, and you’ll never realize that you would have missed every shot in real life. Sometimes there really is no substitute for shooting live ammunition! Because you’re only shooting one or two shots after each presentation, your ammo usage is slowed significantly as you develop your ability to present and fire smoothly.
3. Practice Reloads, Safety Manipulation, and Transitions
One of the ranges I sometimes shoot at has a “no rapid fire” rule that I hate. One look at the holed walls, roof, and floor of the place and I can understand why, but I still resent it and it keeps me from going there more often. Shooting too quickly results in frowns, looks of disapproval, and warnings from the range officers. Learning to shoot quickly is an essential skill for self-defense, but when the range doesn’t allow it, I use this drill to slow down my time between shots fired:
- Load one round each into two magazines. Stuff one magazine into my mag pouch and lock the other into the firearm.
- Chamber the firearm, safety on, low ready position.
- Have a friend call out two numbers on my target as mentioned before.
- Safety off, present the firearm to a sight picture on the first number, BANG!
- The firearm now requires an emergency reload. Drop my empty mag, reload with my other one-round magazine.
- Present the firearm to a sight picture on the second number, BANG!
- Scan and assess, break my tunnel vision, and make sure I’m aware of my surroundings.
I’ve practiced manipulating my safety, shooting at two targets, presenting from the low ready, and executed an emergency reload, and to the range officer it’s just two slow fire shots and no rules broken. I’ve expended only two rounds of ammunition. Going through 100 rounds of pistol ammo and 100 rounds of rifle ammo on this drill takes care of a lot of important repetitions while keeping me accountable with real hits and misses downrange.
P.S. Scan and assess is important to reset your situational awareness after you get fixated on your target. I’ve seen some guys turn their heads in slow motion like Robocop after firing each and every string. I strongly suspect they are doing this to show off to everyone else how well trained and “in the know” they are. Knock it off, guys. Don’t just go through the motions without engaging your brain. Scan and assess to reset your own mental state, not to look like The Terminator in case someone is watching you.
4. Use Dummy Rounds
Plastic dummy rounds are sold as an “action proving tool” to help gunsmiths check the cycling of firearms without using live ammunition in their shops (a very dangerous practice indeed). They also make a great training aid. I like to set up double feeds, stove pipes, and other nasty jams in my guns using the plastic dummy rounds, followed up by live rounds in the magazine itself. Now I have to clear the jam before I can engage the target and finish the drill. To add an element of surprise, have a friend set up your gun with a mystery “failure” of some kind using the dummy rounds while you are loading your mags or otherwise not watching. When the drill starts, you have to diagnose what kind of jam it is, fix the problem, and only then get your first shot fired!
Many shooters will get flustered and rushed, pulling that shot off target because they just finished yanking magazines out, racking slides, and generally trying to get their gun up and running in a panic. Someone once told me “amateurs practice something until they get it right; professionals practice it until they can’t get it wrong.” Picking up a jammed gun, clearing it, bringing it on target, and firing a controlled pair right dead center should feel as comfortable and ordinary as firing an entire magazine flawlessly. And you won’t burn through ammo nearly as quickly.
Incidentally, its fun to prank your friends by sneaking a dummy round into one of their mags when they aren’t looking, forcing them into an unexpected tap-rack drill. However, doing it during an IDPA or 3-gun competition is not cool and will result in anger and hurt feelings!
5. Change Firing Positions
Obviously, range rules strongly apply here. If your shooting range doesn’t allow holster work, chances are they aren’t going to allow you to be hopping up and down in various positions with loaded guns either. However, if your range allows it, I’m a big fan of firing two shots standing, two shots kneeling, and two shots from the prone. You HAVE shot your pistol from the prone, right? Now, reload in between firing positions. Now, transition from rifle (standing) to pistol (kneeling) and back to rifle (prone), then work your way back up to the pistol (kneeling) and rifle (standing) again. That drill will expend a total of ten rounds fired, so you can do it three times in a row if you have a single 30 round magazine.
Hustle up! I’ve seen guys with $2,000+ rifles fail to complete that drill because they were so winded and out of shape that they couldn’t hold their rifles steady by the time they got to the final shots. If you are at an outdoor range, leave your firearm at your bench with a dummy round “jam” in the chamber, and do a couple of sprints and some push-ups before you pick it up, clear it, and start shooting. Set up a folding table as a barricade and practice firing around it while exposing as little of yourself as possible. Now you are really training! Can you make every shot count with your heart pounding, your small targets far away, and another dummy round hiding somewhere in the middle of the magazine? Your skills will improve in just a single range trip with this mindset, and every shot will go towards making you a better shooter, a calmer shooter, a more prepared shooter.
Let me know what tricks and tips you folks use to slow down your ammo usage and train harder for each round fired. I want to see what you’ve got up your sleeves!


